Test Plans
This chapter explains how to create, search, clone, edit, tag, print, disable, and export a Test Plan in Kiwi TCMS.
Searching for Test Plans
To view the Test Plans you have created, click Personal menu::My Test Plans.
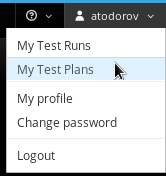
Other Test Plans can be searched via the SEARCH item in the Main menu:
Click SEARCH::Search Test Plans
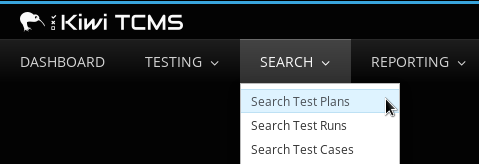
In the Search Plan screen, enter the required search details.

Click the Search button and the search results appear.
To sort on a column, click the column heading.

Note
There is no need to use wildcard characters. The search results show all occurrences of the string, regardless of location. For example, searching for the Plan Name ‘x11’ will return plans named ‘xorg-x11’ and ‘libX11’.
Creating a Test Plan
A Test Plan should identify which features of a product will be tested and what the overall test strategy is. This is a high level document which should not include specific testing steps. It is recommended to use an IEEE 829 Test Plan format but you are free to enter any kind of text. To create a Test Plan:
From the Main menu, click TESTING::New Test Plan.
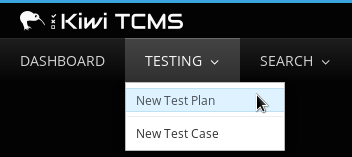
In the Create New Test Plan screen, perform the following actions:
Enter the Name
Select the Product
Select the Version
Select the Type of Test Plan
Enter the Parent ID, this is optional
In the Plan Document text box enter the details of the Test Plan
Enter a Reference Link to any additional information (eg. a wiki page), this is optional
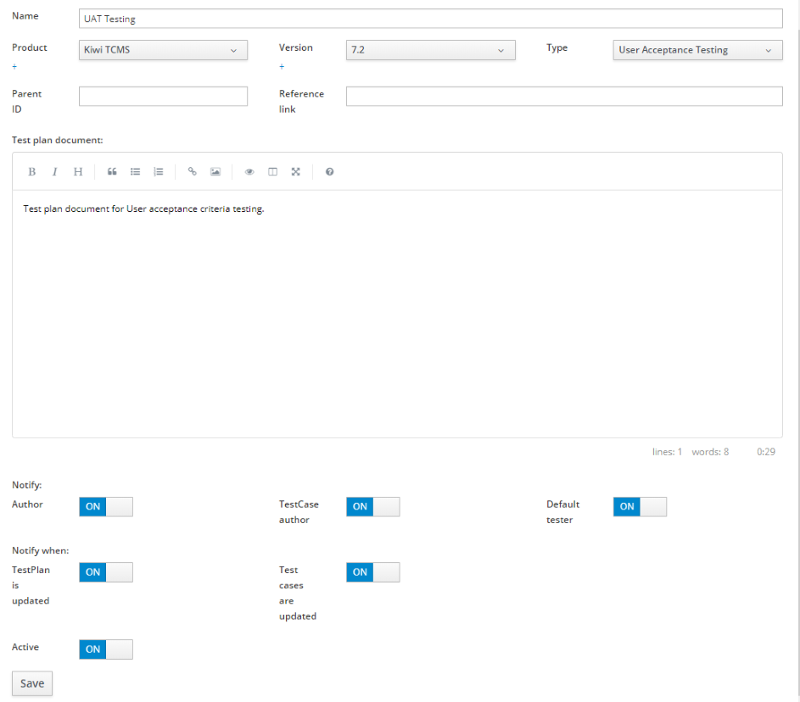
Click the Save button
Cloning a Test Plan
Cloning allows a user to replicate an existing Test Plan for a new product or a new version of the current product. To clone a Test Plan:
Open the Test Plan which will be cloned.
From the object navigation menu click the Clone item.
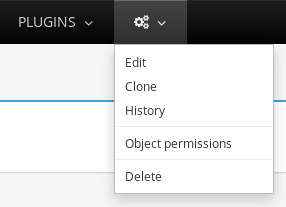
In the Clone TestPlan screen, perform the following actions:
Enter the Name.
In Product, select the product.
In Version, select the version.
Tick the Clone TCs if you want to clone test cases, otherwise they will be only linked into new TP
Tick the Parent TP if you want create parent-child relation to new TP
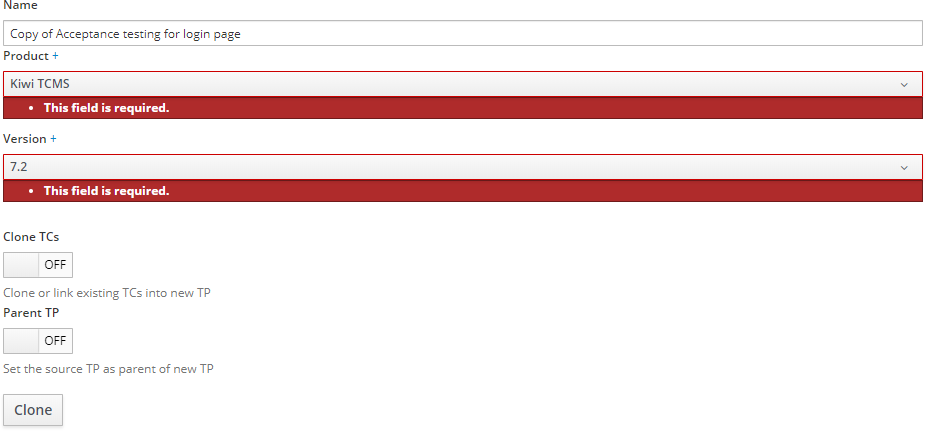
Click the Clone button and the new Test Plan will be created.
Editing a Test Plan
The Edit function modifies fields in a Test Plan. It does not change any Test Cases or Test Runs associated with the Test Plan. To edit a Test Plan:
Open the Test Plan to be edited.
From the object navigation menu click the Edit item.

Edit the fields as required:
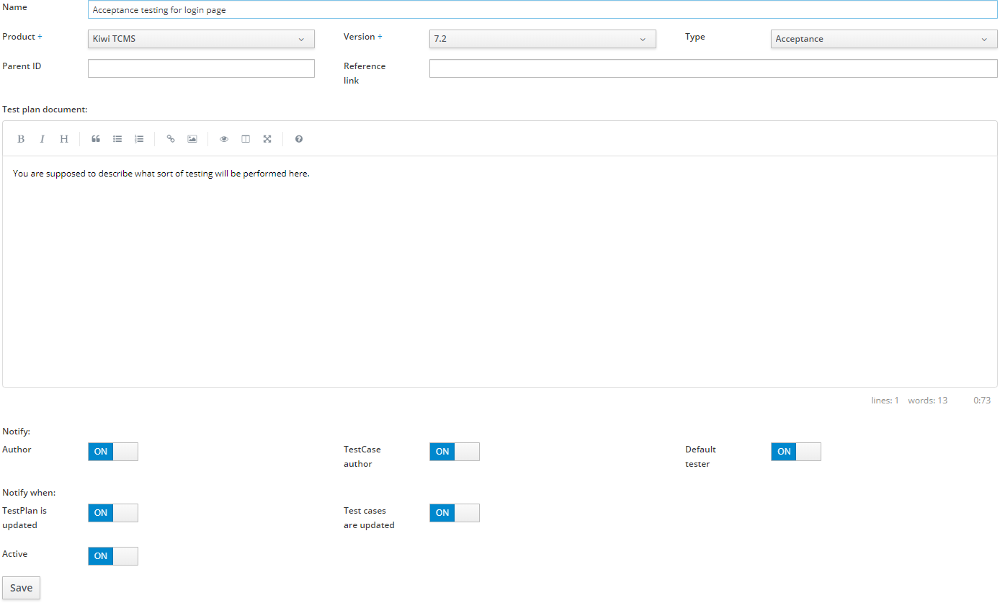
Click the Save button.
Change History
To view changes of a Test Plan document:
Open the Test Plan
From the object navigation menu click the History item

Bulk update
To perform bulk-update for selected test cases:
Select the test cases to be updated
Click the bulk-update menu dropdown
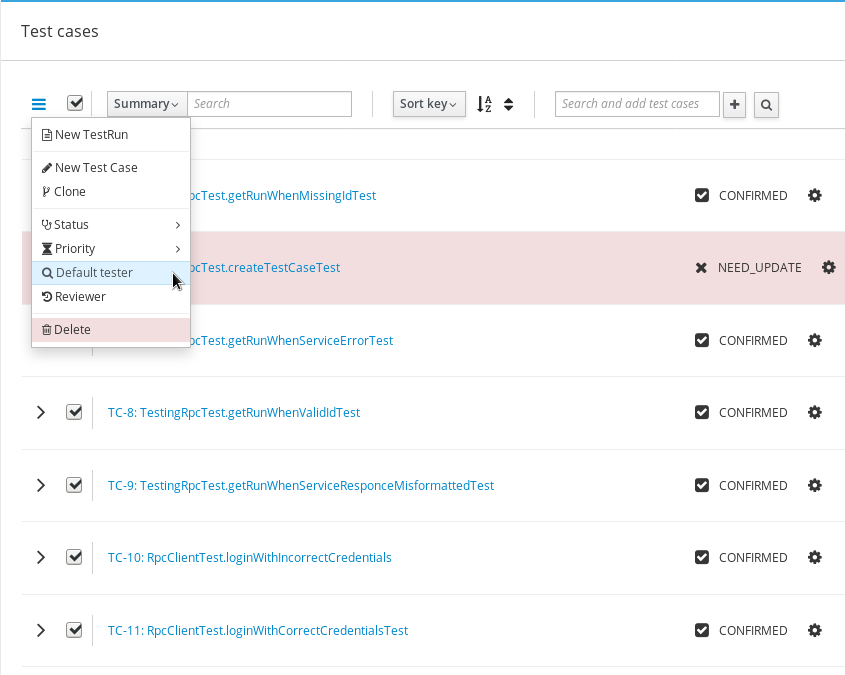
Select which attribute to update
Enter the new value
Click OK.
Disabling a Test Plan
A disabled Test Plan can not be used to create Test Runs. However, unlike deletion, it does not permanently remove the Test Plan from the database. It is best to disable older Test Plans instead of deleting them otherwise you will lose your testing history. To disable a Test Plan:
Open the Test Plan to be disabled.
From the object navigation menu click the Edit item.
At the bottom of the screen toggle the Active button to Off

Click on Save button to confirm changes.
The plan headline changes to a strike-through font.

Re-enable a Test Plan
To enable a disabled plan:
From the object navigation menu click the Edit item
Toggle Active button to On
Click on Save button to confirm changes.