Administration guide
The ADMIN menu allows administrators to manage:
Group and user permissions
Bug tracking systems
and more …
Kiwi TCMS admin interface is automatically generated by Django and allows the user to add, edit and delete records in the database.

Configure external bug trackers
One of the first steps when working with Kiwi TCMS is to configure bug
tracking systems. This can be done via the interface located at
ADMIN -> Everything else -> Test cases -> Bug trackers.
Each bug tracker is given a name, URL, API credentials and integration type.
The extent of integration with 3rd party bug tracking systems is documented
in tcms.issuetracker.
Important
External bug tracker integration classes are defined as a dotted path list
in the EXTERNAL_BUG_TRACKERS setting, see Kiwi TCMS configuration settings.
Plugins and Kiwi TCMS admins may override this setting to provide more
control and customized integration.
Added in version 8.5.
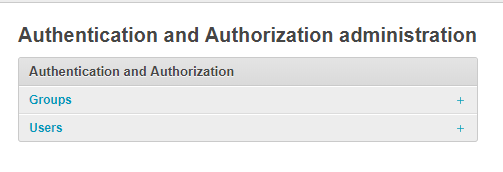
Managing permissions
The Authentication and authorization section covers Groups, Users and permissions.
Important
Permissions are usually assigned on groups but they can be granted on individual users too! It is recommended to use groups for permissions management. Any permissions granted directly to a user will supersede group-level permissions!
Important
The standard User and Group permissions are unbound, in other words not related to individual records in the database. They are used to control access to types of resources, e.g. “Can view bug”, “Can delete test case”! For object-level permissions see below!
Warning
Kiwi TCMS requires the auth.view_user permission in order to display
read-only information on user profile pages! This permission is
not granted by default because the profile page contains personal
information like names and email address.
Administrators may grant this on individual or group level if access to such information is considered acceptable.
Added in version 8.6.
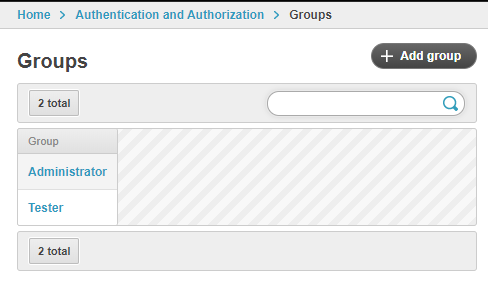
Groups
Kiwi TCMS uses groups to manage access to parts of the system. Groups have two fields: name and permissions. By default there are two groups created
Administrator - has all available permissions;
Tester - has
add,change,deleteandviewpermissions from theattachments,bugs,django_comments,linkreference,management,testcases,testplansandtestrunsapplications. These are the permissions required for normal usage of Kiwi TCMS!
To ensure that all necessary permissions are assigned to the default group (Tester) and that the stale permission objects are removed, after the system installation or upgrade use the following management command:
./manage.py refresh_permissions
Important
Tester is the default group to which new user accounts are assigned!
This can be controlled with the DEFAULT_GROUPS,
see Kiwi TCMS configuration settings.
Warning
You can’t delete the Administrator and Tester groups.
While you can change their permission sets that’s not recommended because
they will be reset by the upgrade and refresh_permissions
management commands! It is better to create new default group(s) instead!
Changing the default group
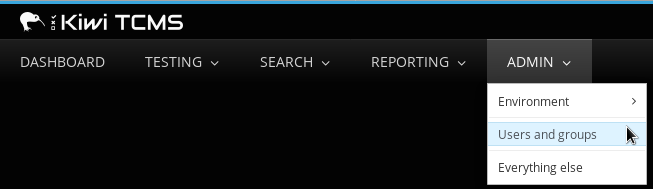
From the ADMIN menu, click Groups.
Click Groups, then click Add Group.
In the add group screen, perform the following actions:
Enter the Name for the group.
From Available permissions, select the Group’s permissions.
Click Add.
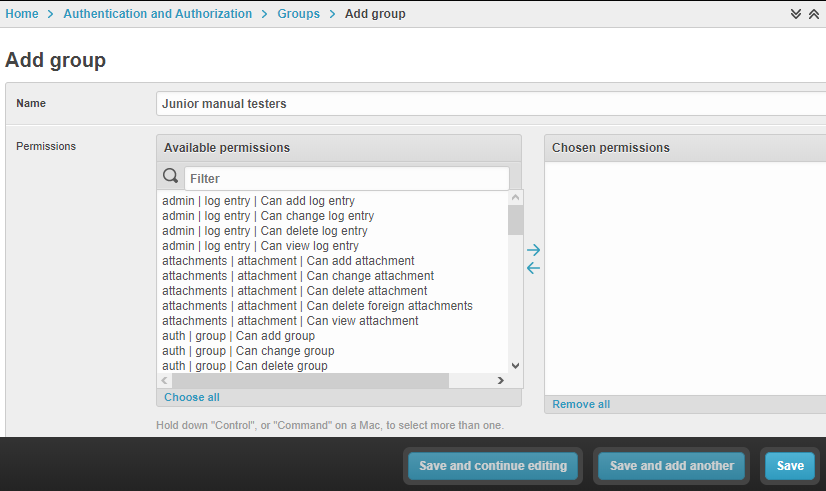
The Chosen permissions list is updated.
Click Save.
Then change the DEFAULT_GROUPS setting, see Kiwi TCMS configuration settings.
Tenant groups
Added in version 11.3-Enterprise.
Kiwi TCMS Enterprise and other versions where the kiwitcms-tenant plugin is installed also support groups & group permissions which are valid only in the context of the current tenant!
Tenant groups allow more flexible access control for the same user account
across different tenants. For example John may have view and change
permissions on mobile.tenant.example.com but add and delete
permissions on backend.tenant.example.com!
Important
In a multi-tenant instance of Kiwi TCMS Tenant Groups replace the regular Group model described above! Regular groups control only what’s known as the public tenant.
By default there are two tenant groups created - Administrator and Tester. Their behavior and constraints are similar as described above, however the available permission scope has been restricted to labels relevant to tenant operations.
Important
When a new tenant is created the tenant owner is added to both Administrator and Tester groups because they need a certain set of permissions to be able to configure the tenant further.
Warning
Authorized users will be added to tenant groups which match
the DEFAULT_GROUPS setting if such tenant groups exist.
When there are no tenant groups matching the configuration then authorized users will be left without group associations. In this case a Kiwi TCMS administrator should manually assign permissions and tenant groups for each user.
If you want to keep the DEFAULT_GROUPS behavior consistent across
Kiwi TCMS you should define tenant groups with the same names on each
tenant!
Changed in version 11.5-Enterprise.
Users
Important
In order for non-superuser accounts to be able to add new users they
need the auth.add_user and auth.change_user permissions together!
Added in version 11.4.
Staff status
A user with Staff status can access the Admin panel. This is required
for normal Kiwi TCMS usage because many records can only be manipulated via
admin pages! Upon account creation the is_staff flag is automatically
granted and the user is assigned to DEFAULT_GROUPS.
To assign Staff status:
From the ADMIN menu, click Users and groups.
Click Users.
In the Search Bar, enter the username, and then click Search.
Click the Username.
In the Permissions screen, select Staff status.
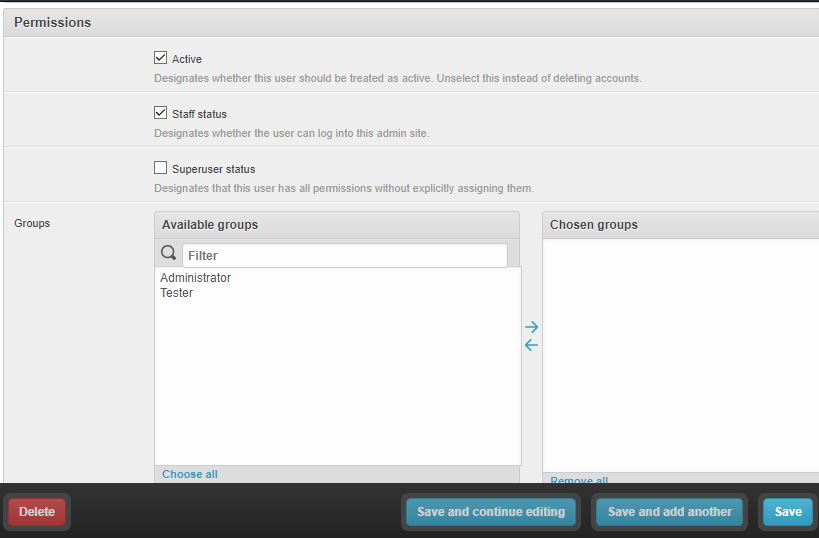
Click Save. The Staff Status icon changes to a green tick.
Note
If the user requires full permissions, select Superuser status.
Adding a user to a group
To add a user to a group:
From the ADMIN menu, click Users and groups.
Click Users.
In the Search Bar, enter the username, and then click Search.
Click the Username.
From Groups select the user to add.
Click Save.
Updating personal information
Kiwi TCMS can store email, first and last name details of a user. To update personal information:
From the ADMIN menu, click Users and groups.
Click Users.
In the Search Bar, enter the username, and then click Search.
Click the Username.
From Personal Information edit:
First Name
Last Name
Email Address
Click Save.
Deleting a user
Danger
Users can be deleted from Kiwi TCMS however this will remove all database records connected to this user. A user that is no longer required must be disabled instead!
To disable a user:
From the ADMIN menu, click Users and groups.
Click Users.
In the Search Bar, enter the username, and then click Search.
Click the Username.
Untick the Active checkbox.

Click Save.
Object-level permissions
Added in version 8.8.
Object-level permissions are bound to a particular record in the database. They are used to control access to specific objects, e.g. “Can view bug 919”, “Can delete test case 2029”! This section describes how object-level permissions are used in Kiwi TCMS and their limitations.
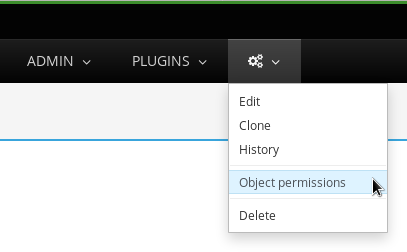
The following HTML pages honor object-level permissions:
Bug page
TestCase page
TestPlan page
TestRun page
Unlike HTML pages most API methods represent bulk operations and don’t support the notion of a single record. Object-level permissions are not honored by the API layer
Unbound permissions always supersede object-level permissions. You can’t use object-level permissions to prevent access
Available permission labels are related to the current object type, e.g. when editing object-level permissions for Bug-919 you can only assign permissions related to bugs
Assignning
addpermission doesn’t make sense here because creating new objects is related to their type, not the individual objectviewallows per-object access with the limitation that HTML pages use API calls to render related information! Some parts of the page will not be renderedchangepermission will not allow modification of many-to-many properties such as tags, components, comments, attachments because these are controlled via separate types of permissions to allow more granularity to adminsview+changeallows access to object history because the history admin allows you to revert to older versionsdeletewill allow to cascade-delete all related objects even if the user doesn’t have explicit permissions granted for themA record with username
AnonymousUseralso exists
Example of more granular permission organization
By default Kiwi TCMS comes with 2 groups that either contain all available permissions or just the ones required by all parts of the application. This section describes a more granular approach.
Leave the Administrator and Tester groups intact and create new ones!
Need-to-know level
Create a Need-to-know group without any permissions and assign users to it. You can make this the
DEFAULT_GROUPSsetting.Don’t assign permissions to individual users
Grant object-level permissions on each user that needs access to particular object!
Users will be able to login into Kiwi TCMS and see their dashboard and will have direct access to records on which they have been granted object-permissions but nothing else. View and change capabilities will be limited.
Read-only level
Create a Read-Only group and assign only
viewpermissions to itWill also work with users who are not members of any groups
Users will be able to login into Kiwi TCMS, search and view pages according
to the permissions granted. If you grant all permissions of type view
then the user should be able to see everything in Kiwi TCMS.
Moderator/Manager level
Create a group and assign
add,deletepermissionsObjects of types Products, Versions, Builds, etc. are controlled via the
managementapplication while other apps control a few more objects like statuses and types. These can be seen in the Admin panel page
You will assign users to this group if they are trusted enough to be able to create and moderate objects.
Tester level
Depending on your process organization you may want to only grant certain
permissions for the attachments, bugs, django_comments,
testcases, testplans and testruns applications. Here a mix of
view, change and add will allow group members to test & provide
execution results but not delete records. Pay attention to permissions for
many-to-many relationships like tags, components, etc which may be used
to control specific parts of a page.
Mix & match
Kiwi TCMS will evaluate all individual, group and object-level permissions when checking for access. It is possible to create a very granular list of groups and then assign users to various groups depending on what level of access you want to provide for them!
Management commands
Kiwi TCMS and its components ship with multiple management commands. They are generally executed in the form:
docker exec -it kiwi_web /Kiwi/manage.py <command_name> [args]
Here are a few useful commands:
initial_setup- initial configuration of Kiwi TCMSset_domain- configure Kiwi TCMS domain name for use in links & emailscreatesuperuser- create a superuser in the databasemigrate- apply DB migrations if necessaryshowmigrations- show the list of applied/pending DB migrationsrefresh_permissions- refresh permissions for the specialTesterandAdministratorgroups and remove stale onesdelete_stale_attachments- remove attachments for which the related objects don’t exist anymore. Follows theDELETE_ATTACHMENTS_FROM_DISKsettingdelete_stale_comments- remove comments for which the related objects don’t exist anymore
Explanation of editable entities
Some DB entities are editable via the Admin interface. Their meaning is explained below.
Products
All testing is based around products made by the organization.
Product Classifications
A Classification is a title used to group products of a similar nature. For example: Mobile apps, Desktop apps, etc.
Builds and Versions
The entity Build describes a product build used for testing. Depending on your versioning scheme and release workflow this entity may be used or not!
For example there could be an upcoming product version tagged “3.1” with several daily builds (aka smaller versions) until you are satisfied with the quality of the product before “3.1” released.
On the other hand if you release often in small increments product Version is likely the only numbering scheme that you will use. Each product in Kiwi TCMS needs a version. Many products will have multiple versions. For example, Firefox 3.0.14, 3.5.3.
Kiwi TCMS allows both Build and Version to be specified when testing. If you don’t use builds we advise you either to leave as “undefined” or use the same value as for the version being tested.
Components
A product is broken down into components. For example, two components of Kiwi TCMS are the web interface and the RPC API service. Components may be used to classify test cases that are related to particular area under test.
Priorities
Test cases can be assigned a priority. The priority designation may be used to organize your testing workflow and does not have special meaning inside Kiwi TCMS.
Test Plan types
A Test Plan type is used to describe the test being performed. For example, acceptance or smoke testing, functional testing, etc.
Test Case categories
A test case category may be used to further describe the type of test being performed or convey additional information about the test case. Similar information may also be conveyed with tags, properties or in other way so it is up to you to decide how you want to organize your testing workflow!
Test Case statuses
Added in version 8.9.
Kiwi TCMS installs several pre-configured statuses by default. Starting with v8.9 you can fully customize them!
Important
Confirmed statuses indicate that a test case is ready for execution and can be added to a test run. Kiwi TCMS doesn’t implement any additional behavior wrt status names.
Warning
Make sure to always have at least 1 confirmed and 1 unconfirmed status, e.g.
CONFIRMED,NEEDS_UPDATE. If you delete all statuses within a certain group Kiwi TCMS will crash!Note
For statuses shipped with Kiwi TCMS the names may appear translated into local language! If you change these default names they will appear untranslated!
Translation of non-default names is currently not straight forward, see https://github.com/ecometrica/django-vinaigrette/issues/45.
Test Execution statuses
Added in version 8.0.
As shown in Data organization within Kiwi TCMS TestExecution objects record the status for each TestCase tied to a particular TestRun. Kiwi TCMS installs several pre-configured statuses by default. Starting with v8.0 you can fully customize them!
For this purpose the following fields are available:
Name - human readable status name
Note
For statuses shipped with Kiwi TCMS the names may appear translated into local language! If you change these default names they will appear untranslated!
Translation of non-default names is currently not straight forward, see https://github.com/ecometrica/django-vinaigrette/issues/45.
Color - a color to be used for icons, charts, etc.
Note
For a consistent user experience we recommend using colors of the same family (or even the same color) for the various weight categories - green for Positive, black/gray for Neutral and red for Negative!
Icon - a CSS class to be used for visual display. The accepted value is any valid class name from Font Awesome v4.7 or Patternfly v3.0
Note
Icons must be specified with their full CSS class name. For example
PASSEDisfa fa-check-circle-o!Weight - integer representation of this status
Note
Kiwi TCMS recognizes only 3 weight categories:
Positive -
PASSEDandWAIVED- test completed and was successfull or was skipped/ignored on purposeNeutral -
IDLE,PAUSEDandRUNNING- test has not been executed yet and the result is unknownNegative -
BLOCKED,ERRORandFAILED- test completed unsuccessfully or was not able to complete due to external factors
Kiwi TCMS does not make any other distinction based on weight except when sorting statuses for display (e.g. a row of buttons)! It is up to you to define what each individual status means.
Warning
Make sure to always have at least 1 positive, 1 negative and 1 nautral status, e.g.
PASSED,IDLE,FAILED. If you delete all statuses within a certain weight group Kiwi TCMS will crash!